For those of you who may have missed my first post, I started out on this project with no idea of what to use for the hot end, or how to make one. The tools in my garage are pretty much limited to a powerdrill and an electric screwdriver! I decided to build a hot end design that I could realistically make in my garage, without the use of a lathe, pillar drill or any other fancy machinery.
The hot end basically consists of several parts: the nozzle, the heater barrel, the thermal barrier, a heater block, a heater, and a temperature sensor.
The Prusa CAD model on the wiki includes a basic hot end setup. It uses a 0.6mm MIG welding tip as the nozzle/heater barrel, although the details of the heater are left off. MIG tips are not expensive, and so I picked up a 10-pack from ebay:
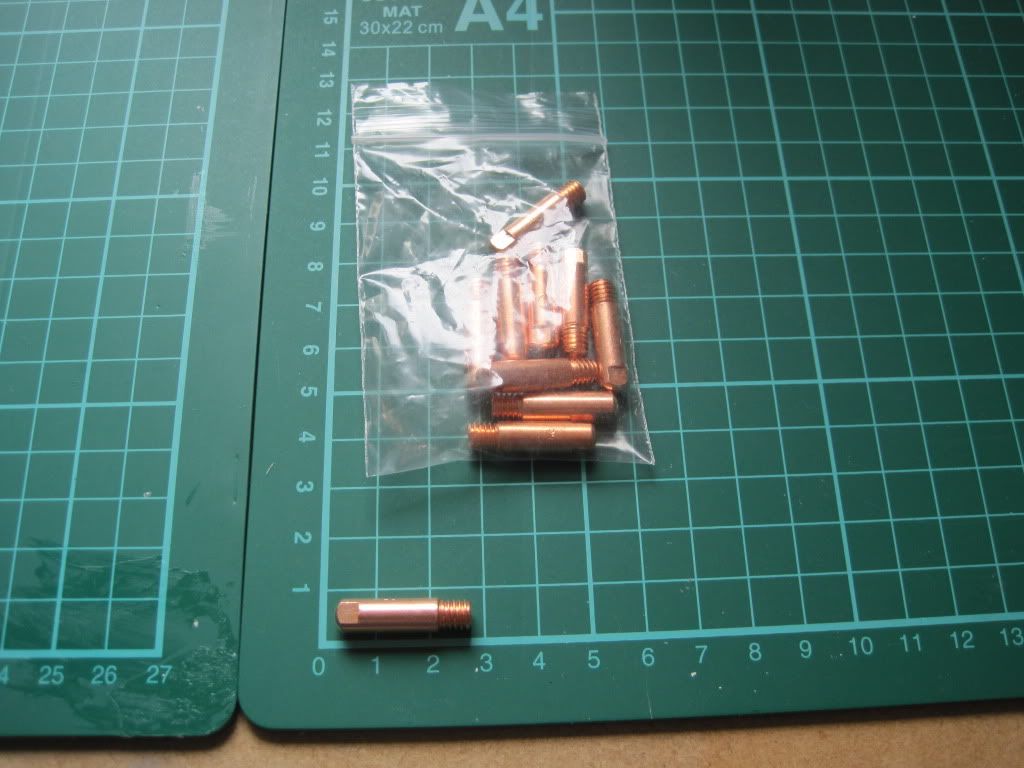 |
| They have a 0.6mm hole straight through the length of the body, and are threaded to M6. |

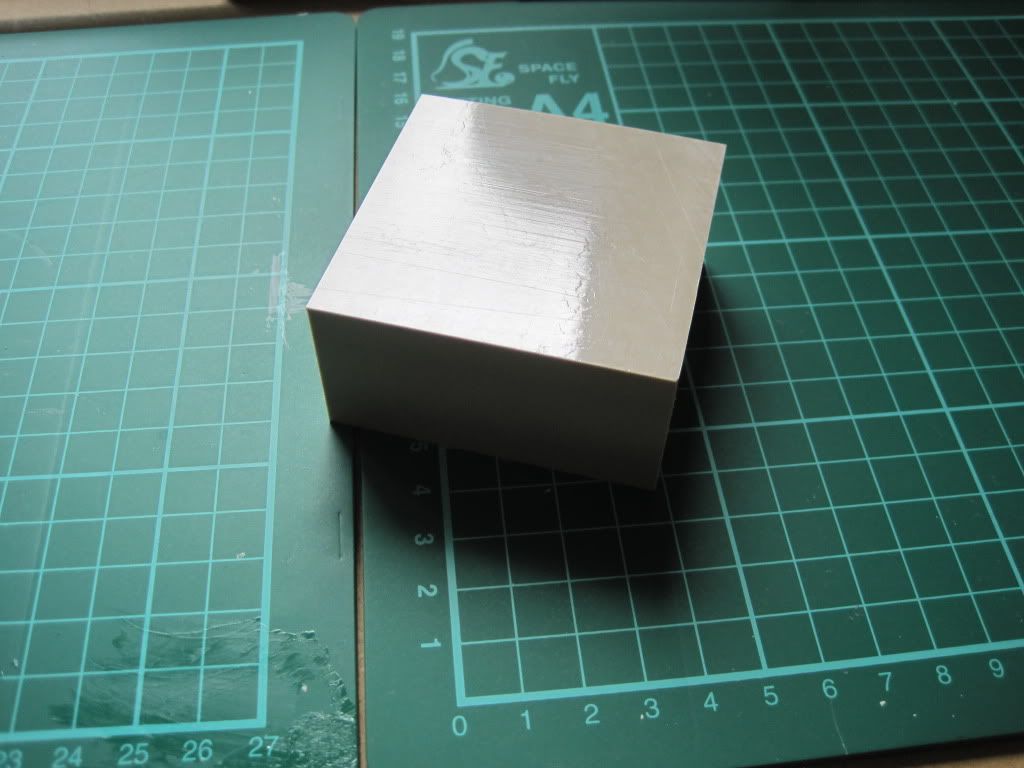
Some designs use a PEEK thermal break, and I happened across some for a good price on ebay. I've not used it yet.
Now for the heater block. This is the one part that really stumped me. I didn't really fancy trying to get hold of Nichrome wire and wrapping the nozzle in it, so I decided to use a block of some sort. I figured that without a drill press or pillar drill, there was no way I could accurately machine one for myself, so I spent a long long time searching for something suitable and pre-made.
I came across these and these on screwfix. they are for bonding wire to earthing rods, but would perform well here as they are brass and have a clamp built in to hold them onto the nozzle. The drawback is that they would need another hole of some sorts drilled into them for the heating resistor, and another for the sensor.
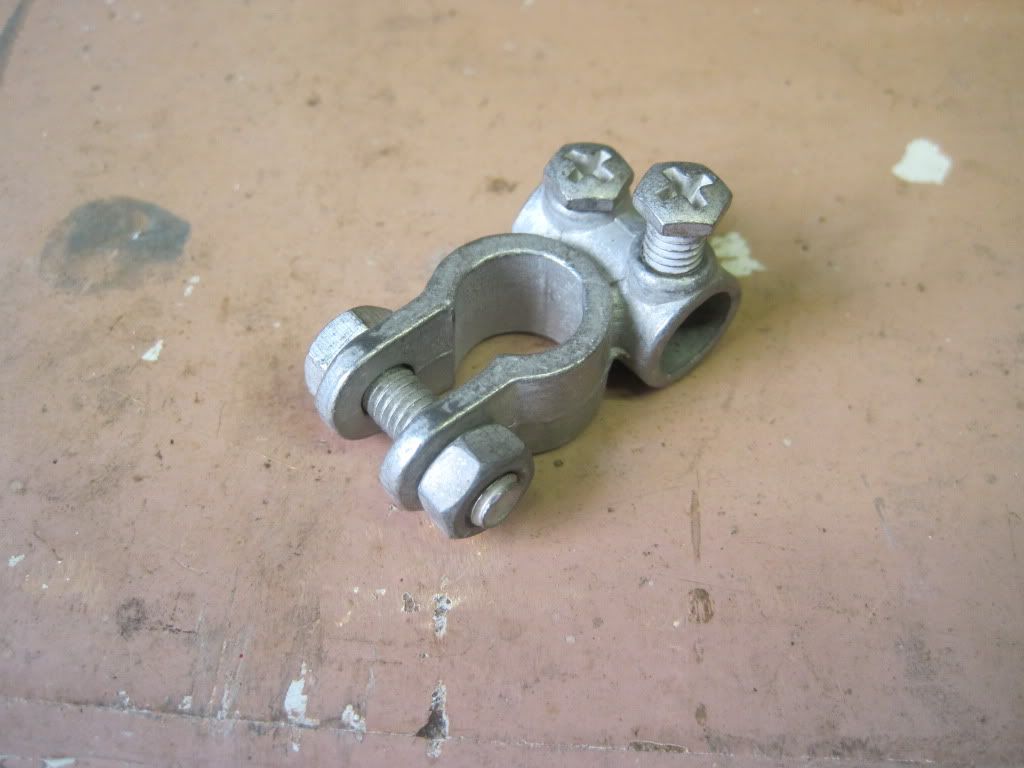
Whilst browsing ebay, I came across car battery terminals. They looked spot on - a larger hole for fitting the nozzle through, and a smaller one at right-angles for the heater. After another long search, I found the smallest ones I could. They are for (older?) Nissans, that use smaller terminals on their batteries, and in particular the negative terminal as it is slightly smaller than the positive. I bought a couple from ECS.
The last problem to solve was how to bulk out the ~6mm diameter MIG nozzle to the ~12 internal diameter of the clamp. Eventually I settled on using a series of copper pipes, cut into sleeves of ascending diameters. I would also use this method to fit the resistor into the 10mm cable hole in the clamp.
I 3D modeled the whole assembly, and fitted it to the X carriage and wades parts:

The large rectangle above the clamp is the PEEK block, cut down. This would have had the thread cut into it to hold the nozzle, and have been held to the assembly with long bolts that also held the extruder body to the carriage. The more I thought about it, the more I worried that coupling the extrusion force directly to the carriage like this would snap the carriage. Eventually I dropped the PEEK, and decided to just use PTFE, and couple it via the screwholes in the extruder body.
Blogging about it seems to trivialise the process a little. I seem to recall spending ages thinking, doodling and searching, trying to find something that would work right, and the struggling to fit it all together in my head.
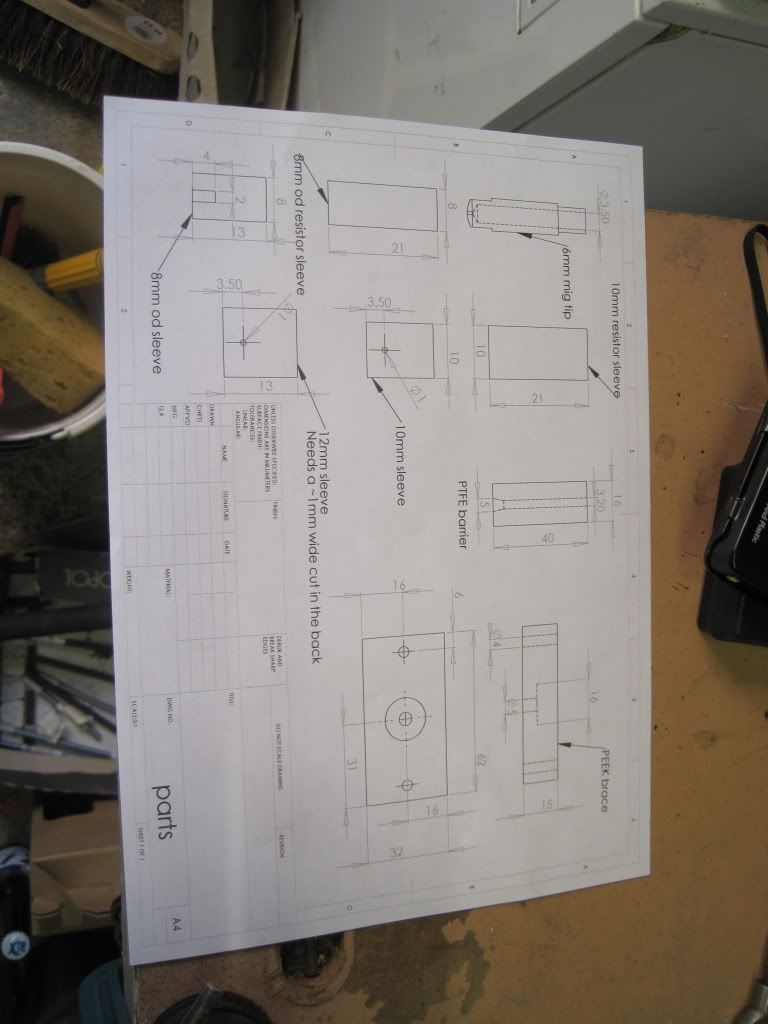
Once I had settled on the design, I started to make bits. I used CAD to make a drawing of all the parts that I had to fabricate. (If anyone wants to replicate this madness, I am happy to post/supply my drawings and models. I might upload to the wiki if this actually works as intended!)
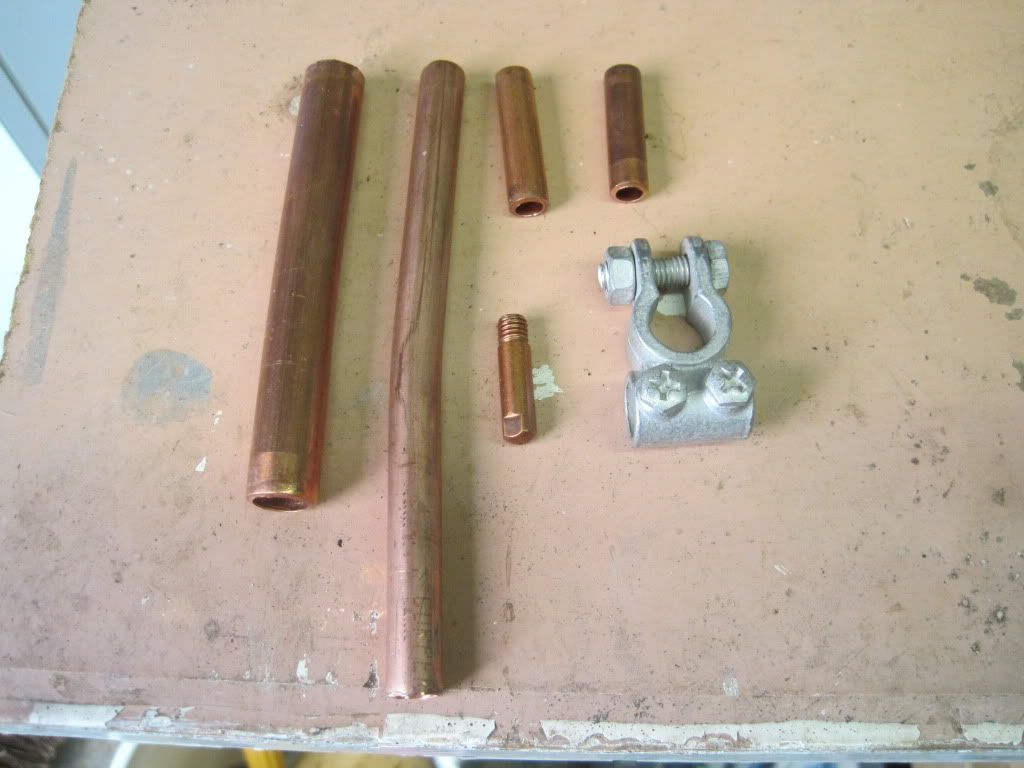
Here are the parts laid out. The copper pipe is some scrap bits that I collected, in 3 sizes.
Fast forward through lots of sawing, and drilling pipe to expand the diameters a bit:
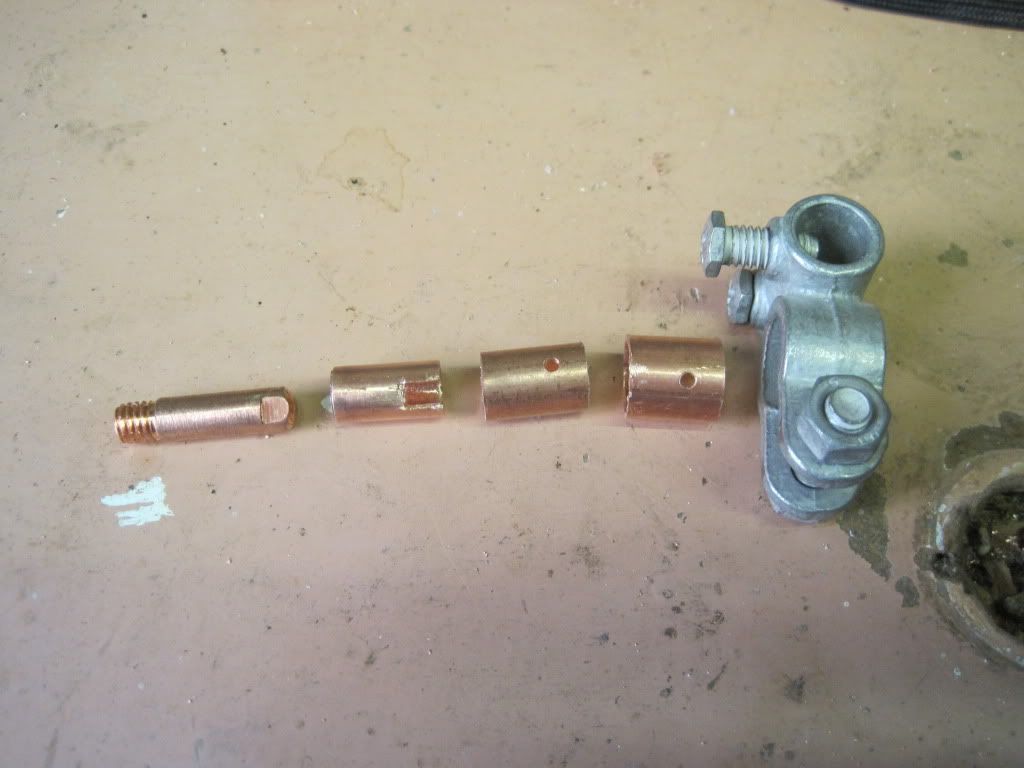
I drilled the MIG tip out to 3mm internal diameter, as deep as I dared. I had intended to drill it progressively, but the hammer action came on on the drill by accident and snapped the 1.5mm bit I was using, so I started again and just went to full width from the start - it was hard work! The sleeves have holes and slots in them, such that the sensor can reach right though the sleeves and be held captive against the flats on the tip. the tip and sleeves 1 are such a tight fit that I had to turn down the outside of the tip with a file. Sleeve 3 is too large in diameter, so I cut a slot in the back and reduced the diameter (in a manner that my sister - a jeweller - would have cringed at). I also cut down the pipe for sleeving the resistor:
The next job was the PTFE barrier. Shouldn't be too hard, right?
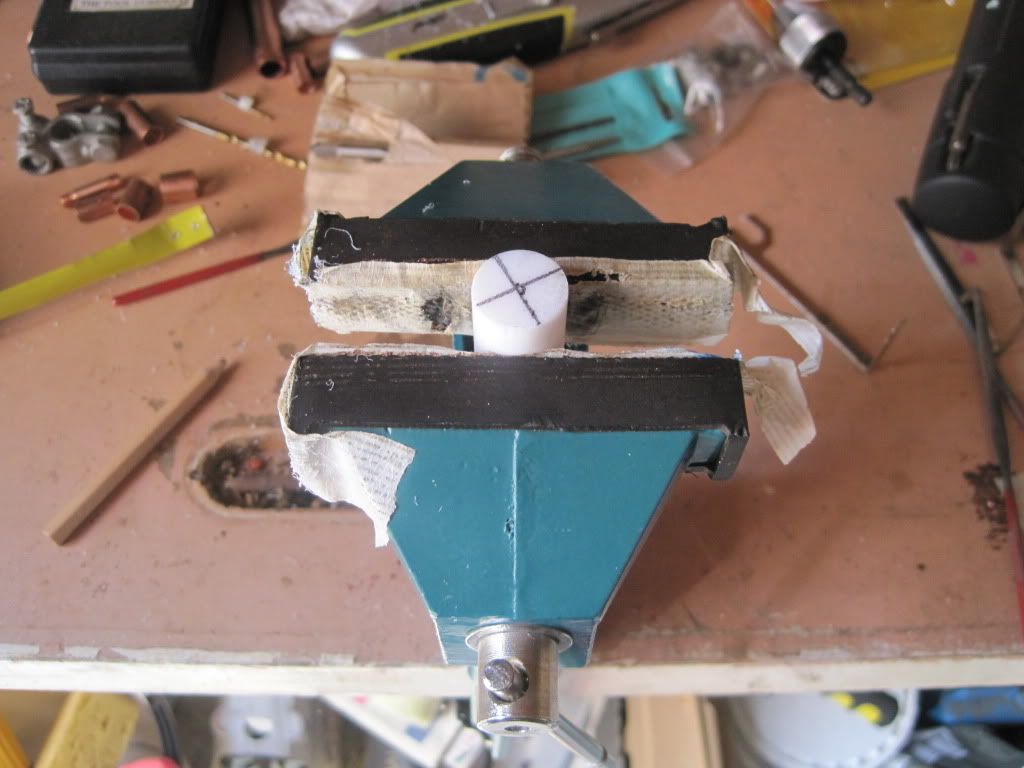
Turns out, it was very difficult. This is the only part that really needed a machine tool. It was very difficult to get the hole straight down the middle. I actually succeeded first time, but then as I tried to drill the counterbore for the thread, the bit "grabbed" too much and went way too deep, ruining the part. The two subsequent tries were as bad, or worse:
I encountered one of the lowest points so far on the project. I just couldn't do this bit, no matter how hard I tried. I had seen somewhere the notion that a reprap should be buildable in the garage, with no special tools. I know that I am pushing that definition a long way by having almost nothing in terms of tooling, but the longer I went on the more determined I had been to make the entire printer without machine tools. I thought that if I could invent a design that didn't use anything more than a drill, maybe I had something to add to the reprap world. It looked like I just couldn't do it.
Eventually I decided that I had come too far to give up. I'm really interested in printing afterall, and taking this hardcore home-fabbing approach wasn't getting me any closer to my goal. Grudgingly I set aside the idea of a machine tool-free hot end, and took the remaining PTFE into work. Less than 10 minutes on the lathe produced a lovely looking thermal barrier:
I took it home and tapped it to M6:
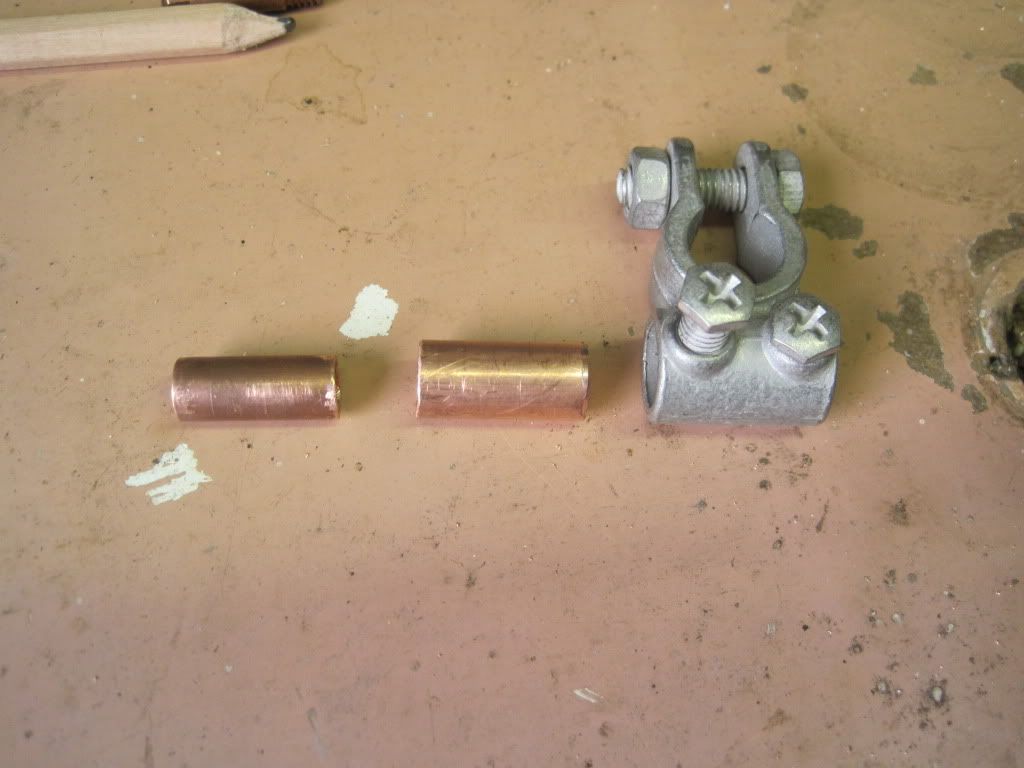
I used heat-sink compound between the layers of sleeves to remove the air gaps. It's not as conductive as metal is, but much much more so than air. I made sure the coating was very thin, just enough to eliminate any air gaps. I tapped the sleeves together with a hammer, using a two blocks of wood to protect the ends.

Here is the nozzle completed:

It feels fairly solid, with the exception of the outer sleeve which has to stay loose until it is clamped.
So that's my hot-end. Next up: all the fun of mounting the extruder, hot end and other stuff!
No comments:
Post a Comment