
As you can see, the suggested M3 by 25mm screws are very long. In fact the back pair are so long they interfere with the smooth rods, and the carriage binds (this is probably due to how the carriage sits on its bushings). I replaced the rear screws with a pair of 12mm ones taken from the X axis ends (which were too long in the X ends anyway, and were replaced with some M3x6 screws I had found in a draw earlier).
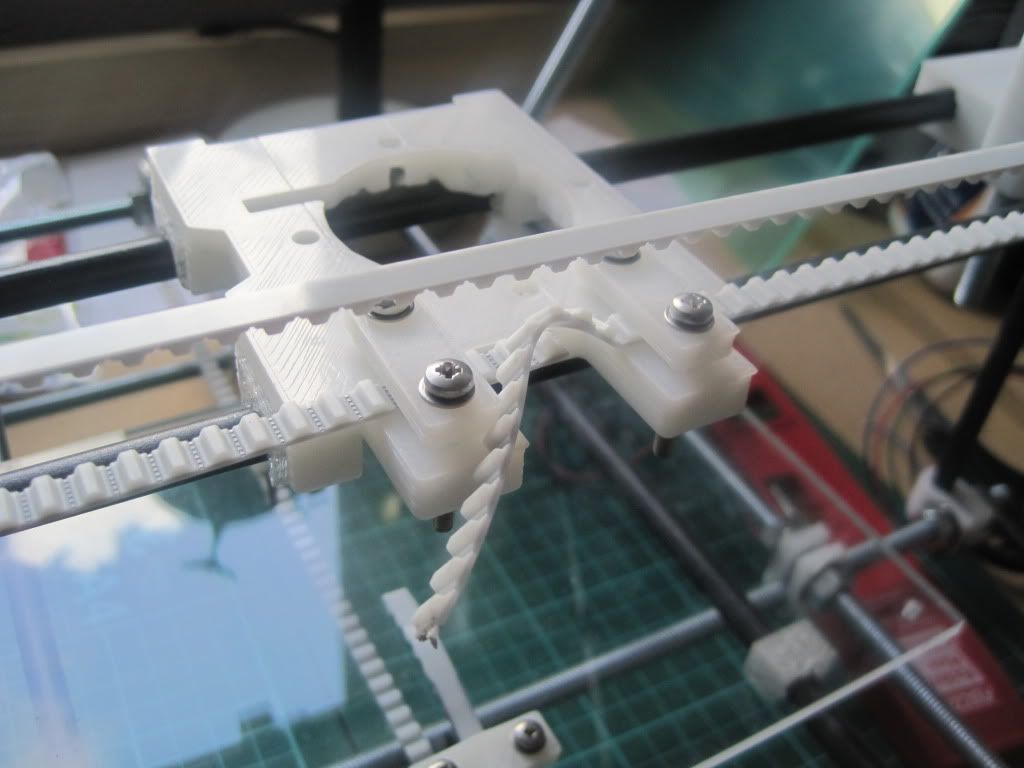
I fitted the X belt in the same orientation as the Y, namely with the teeth facing downwards in the clamps. It was only when I threaded the rest of the belt around the idler and back that I noticed that it was wrong - the teeth should face upwards, and the belt travel above the carriage rather than under it. I reassembled it and tightened everything up. The carriage now moves very smoothly, seemingly with no backlash.
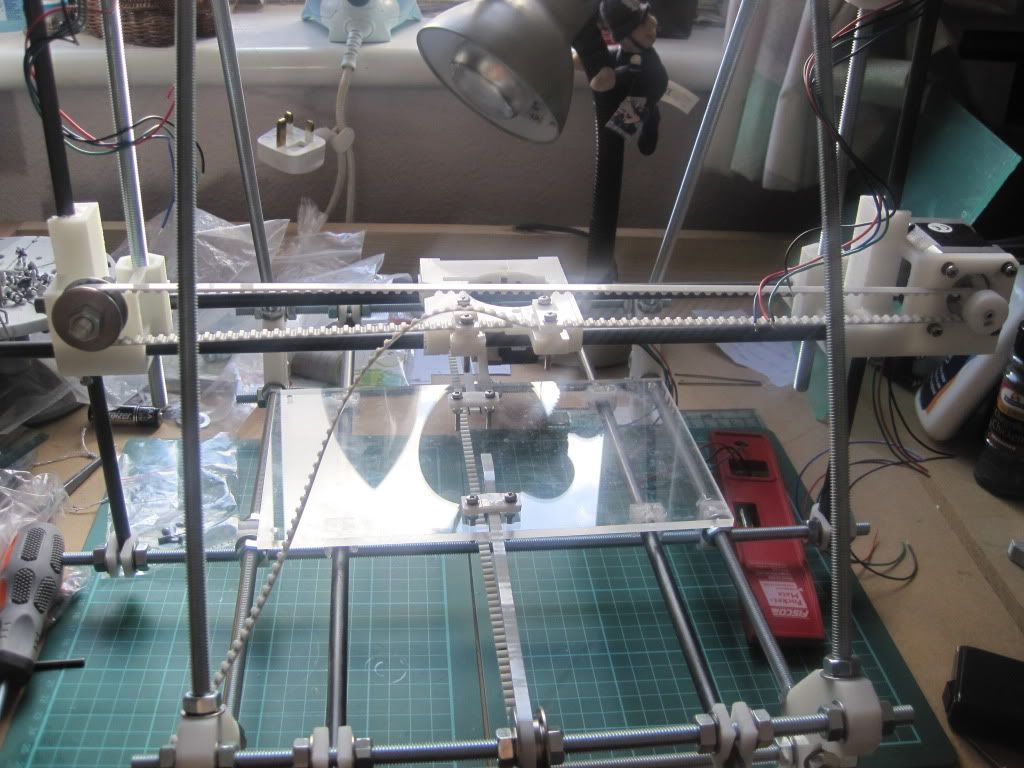
I cut the belt off leaving a little for adjustment later if needed.
And that's as far as I can go today. Next I will build the electronics, but I need a PSU before we have any movement. I can also build the extruder once I get a few more bits delivered.
Whilst in the draw that yielded the earlier M3x6 screws, I also found the solution to the spring problem. I had previously been unable to find a cheap source for the springs needed to tension Wade's idler bearing in the extruder. I found this clothes peg, the spring from which is perfect:
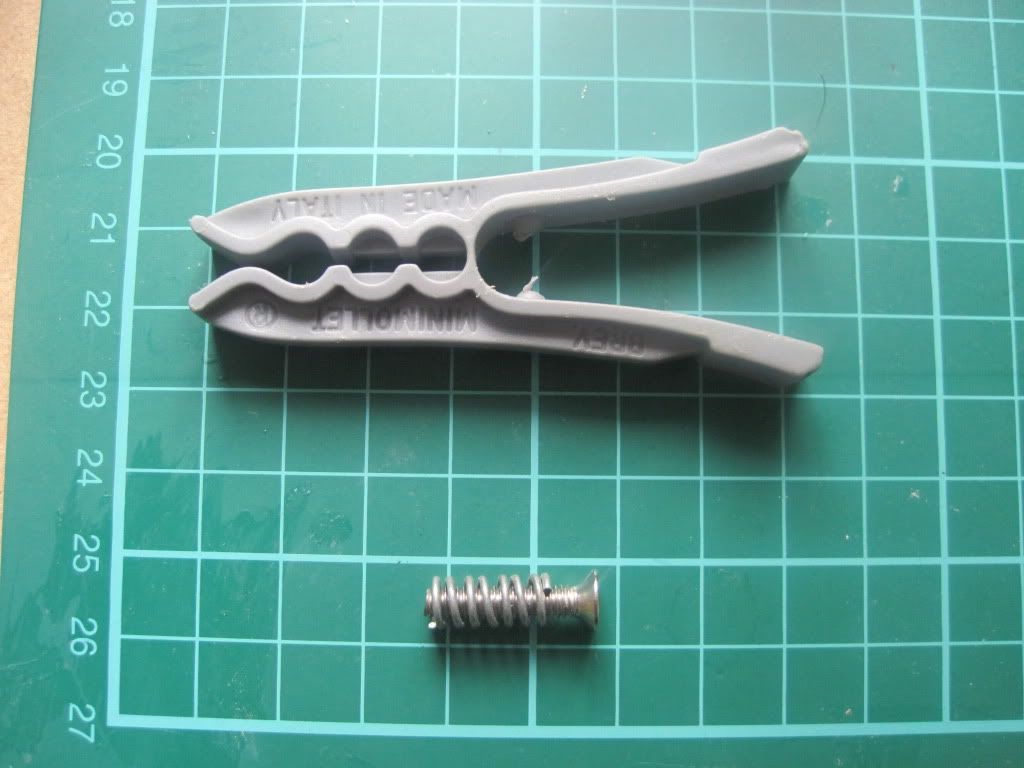
I scoured ebay and picked up a pack of 24 for £2.50 - that's just over 10 pence each, a marked improvement on the £1 or £2 each I had previously seen springs going for.
Next up: Electronics build
No comments:
Post a Comment